In order to master handstands and hand balance in general you need to eventually practice everyday, sorry no quick wins or fast hacks to master handstands, however it’s not just about hard work, because working hard is important but working smart is just as important.
Play safe
When practicing hand balance we place our body in un-familiar and un-comfortable positions. These positions are putting your body in a state of potential injury if not noticing Technic and physical limitations.
Do not overload your wrists and shoulder blades
A rigorous daily repetitive practice of inverted positions “taxes” your wrists and shoulder blades and exposes the body to injurious and inflammatory reactions. The good news is that our tissues and joints in the shoulders and wrists are getting stronger and more durable also if we put gradual stress to progress. So make sure that when you get to a daily practice only when your joints (mostly wrists and shoulders) are “ready” to take the load.
Repeat and diversify
We’ve all heard the phrase “repetition is the mother of all skill”, and it does have a lot of truth, however also diversifying your practice can help. A rule of thumb would be: to keep repeating the basics like chest to the wall, improving the line, opening shoulders, slowing down the breath, etc., and also try to explore new territories every once in a while so that you might find out other new hills to concur.
Technic Vs Strength
Maximum efficiency comes with maximum Technic, strength compensates for the lack of Technic until you develop it. So high-level hand balancers are not relying on strength but on efficiency by Technic.
Start with your downward-facing dog
Learning how to do a handstand is a challenging but rewarding strength feat. This step-by-step guide will teach you how to properly execute one.
Start in a downward-facing dog position with your palms flat on the ground and your feet hip-width apart. Slowly walk your hands forward until they are directly under your shoulders. Firmly press down into your palms and tuck your chin to your chest as you lift your hips and straighten your legs, coming into an inverted “V” shape. Work on keeping a strong connection through the upper arms to avoid collapsing onto forearms. From here, begin to kick one leg up at a time toward the ceiling, keeping hips level and abs engaged throughout the movement. When both legs are parallel to each other in the air, pause for a moment before slowly lowering back down into downward facing dog.”
Slow and incremental improvement
Patience is a key component in mastering handstands, it’s a slow and painful process for most of us, no one is expected to immediately jump into a free handstand, you should start with basics such as downward-facing dog position and handstand with a wall for a longer periods of time. When the shoulder flexibility is limited or the hips flexors are tight and the range of motion for a straight line from the toes to the fingertips is not perfect you should work on improving the range of motion instead of jumping to a more advanced steps such as pressing to handstand or a one arm handstand.
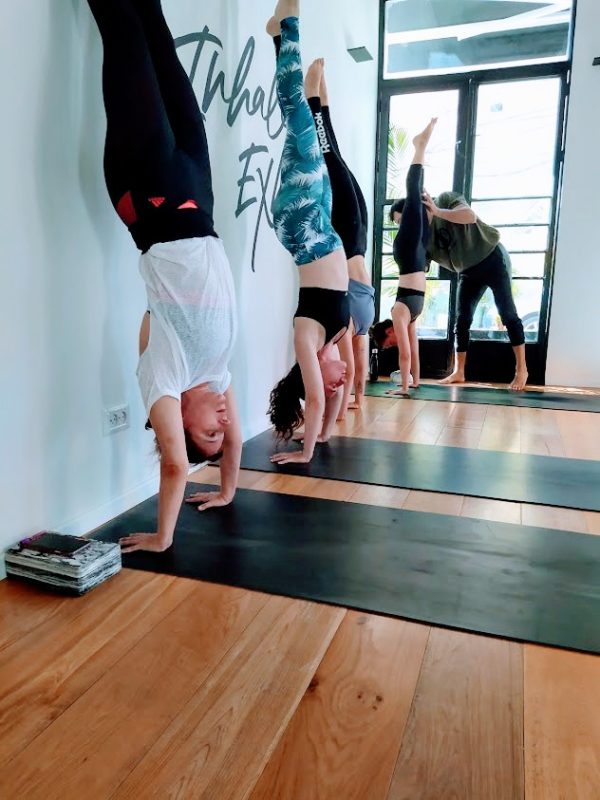
A clip from Athleticult’s handstand class, here we work on basics and the ability to fall correctly, so you can practice handstand in the middle of the room with no fear or risk of falling
